Wednesday, November 16, 2016

Sitecore Experience Accelerator: SXA and Search

First encounters with SXA: Search components

I was investigating the possibilities of SXA, the new Sitecore Experience Accelerator, 1.1. Questions were put on the Sitecore Stack Exchange site - not only by myself of course, also by many others - and that made some things clear. One of the subject I was testing was the search functionality, using the standard components and not adding any code. As it was all on a small test setup, I did not go as far as testing performance and stability, the focus was more on functionality.

But here they are - my first encounters with SXA to share.

Setup a search box and results page

First thing to do was setting up a search result page. I created a page just like any other and added the "Search Results" component from the Toolbox.

Next step was to  have a search box to feed the search page. I placed this one on a partial design to include it on all pages.  As I am still using the built-in basic theme, the search box looks like this:


The labels can be altered. The search box has some properties that can be set: first one seems quite important is the search results page. So we select the page that we created before. We also set the maximum number of predictive results shown in the dropdown. Yes, that's right - the search box has predictive results:


We save, publish it all. And there is our search! As we had some content pages, we get results from the index in our search box and we get send to the search results page as expected. The request to the search results page has the search query in the url query parameters, so analytics tools can pick it up if needed.

Some extra's

Of course, a page with just search results is not very user friendly so we add some more components. Let's add the "Results Count" on top, a dropdown "Filter" as well and the "Page Selector" at the bottom. We will go for a fixed page size, and have set it's value in the Search Results component. We now have something like this:


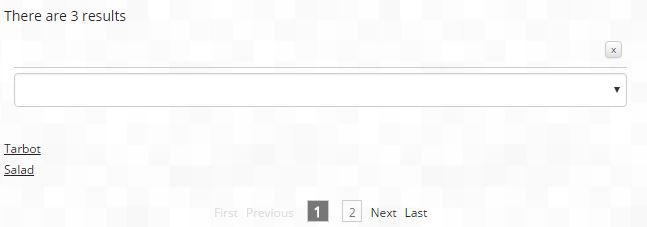
We have set the page size to 2, which is not realistic but managed to show the pagers working without having to add too much demo content pages.

So now we have a search box, results page with counter and paging and no letter code. 

Facets

Our filter is still empty now. The pages in SXA have tagging by default and we did tag all of them with one or more tag values. So lets try to filter on those tags!

First we create a facet "Tag".
In the facet item we set the name and display name and the field name. This is the lower case name of the field that is used in the index and that the facet is based on, in our case it's "sxatags". If you don't know the exact name of the fields you can always find this by looking at the templates used by the (SXA) items.

Once we have the facet item, we create a datasource for our Filter component and set the Facet field to the one we just created. Et voila, we publish and see:

facets with numbers in the dropdown filter box. By selecting one of them, the search results get filtered on the tag. 

Still no line of code...

And further... a Tag Cloud

We also added a Tag Cloud component - and noticed it works very well with our newly created search. 
As it is not styled, it looks like ****, but it works. I get my tags as used in the site and when I select my search results page as a parameter of the tag cloud components, clicking the tags gets me to my search results page with a search on the tag.


Customizing

You can alter the search results look by creating a rendering variant. The default will show the Title or display name of the items, but you can add fields to the default variant, or create a new one and select this custom one in your search results component. You need to create VariantField items to achieve this. 

Note that you can not alter the results look per template type (e.g. add an image to results of type 'Product') but you can add extra fields for it, and if the fields does not exist it will just be skipped.

Issues and/or questions - The conclusion

Questions will rise and problems as well. What is for me still unclear is the way the index behind the search engine works. The search uses one field, "SxaContent" - which is a computed field. But for now it's not very clear what is included in that field (next to the default title and content) and what is not - or how to get things included. 

Another mystery is the updates. As I did some research to using Lucene/Solr indexes for a full site search in the past, I am always curious to see how the updates are handled in index based search solutions. How does a "page" know that some content in a datasource is updated? 
From the tests I made, updating a shared datasource seems to work - all pages are updated. But I had some trouble when I added a new component with an existing datasource to a page - that did not get updated in the index.  That will require some more investigation.

Conclusion

The conclusion is that we have a working search without coding and in a very short time. Does it have all the features that "a customer" might want? No, maybe not. But do compared to the effort needed to put it on the site it's definitely worth considering! A promising first encounter with SXA...

Wednesday, October 5, 2016

Custom Sitecore index crawler

Why? - The case

We needed to find items in the master database quickly, based on some criteria. Language didn't matter and we didn't need the actual item, a few properties would do. So we decided to create a custom index with the fields we needed indexed (the criteria) and/or stored (the properties). All fine, but as we were using the master database we had different versions of each item in the index. As we needed only the latest version in only one language we though we could optimize the index to only contain those versions.

First attempt

We had to override the SitecoreItemCrawler. That was clear. The first attempt was creating a custom IsExcludedFromIndex function that would stop all entries not in English and not the latest version. Pretty simple, but does not work.
First of all, all entries were in English.. this function is only called per item and not per version. So actually, we could not use this. Furthermore, we did not take into account the fact that when adding a new version, we have to remove the previously indexed one.

Don't index multiple versions

I started searching the internet and found this post by Martin English on (not) indexing multiple versions. Great post, and pointing as well towards a solution with inbound filters. But as those filters work for every index, that would be no solution here. I needed it configurable per index. So back to Martins' post. We had to overwrite DoAdd and DoUpdate.

A custom index crawler

The result was a bit different as I was using Sitecore 8.1 and also wanted to include a language filter. I checked the code from the original SitecoreItemCrawler, created a class overwriting it and adapted where needed.

Language

I made the language configurable by putting it into a property:
private string indexLanguage;

public string Language
{
  get  {  return !string.IsNullOrEmpty(indexLanguage) ? indexLanguage : null; }
  set  {  indexLanguage = value; }
}

DoAdd

The DoAdd method was changed by adding an early check in the language-loop to get out when not the requested language. I also removed the version-loop with a request for the latest version so that only that version gets send to the index.
protected override void DoAdd(IProviderUpdateContext context, SitecoreIndexableItem indexable)
{
  Assert.ArgumentNotNull(context, "context");
  Assert.ArgumentNotNull(indexable, "indexable");
  using (new LanguageFallbackItemSwitcher(context.Index.EnableItemLanguageFallback))
  {
    Index.Locator.GetInstance<IEvent>().RaiseEvent("indexing:adding", context.Index.Name, indexable.UniqueId, indexable.AbsolutePath);
    if (!IsExcludedFromIndex(indexable, false))
    {
      foreach (var language in indexable.Item.Languages)
      {
        // only include English
        if (!language.Name.Equals(indexLanguage, StringComparison.OrdinalIgnoreCase))
        {
          continue;
        }

        Item item;
        using (new WriteCachesDisabler())
        {
          item = indexable.Item.Database.GetItem(indexable.Item.ID, language, Version.Latest);
        }

        if (item == null)
        {
          CrawlingLog.Log.Warn(string.Format(CultureInfo.InvariantCulture, "SitecoreItemCrawler : AddItem : Could not build document data {0} - Latest version could not be found. Skipping.", indexable.Item.Uri));
        }
        else
        {
          SitecoreIndexableItem sitecoreIndexableItem;
          using (new WriteCachesDisabler())
          {
            // only latest version
            sitecoreIndexableItem = item.Versions.GetLatestVersion();
          }

          if (sitecoreIndexableItem != null)
          {
            IIndexableBuiltinFields indexableBuiltinFields = sitecoreIndexableItem;
            indexableBuiltinFields.IsLatestVersion = indexableBuiltinFields.Version == item.Version.Number;
            sitecoreIndexableItem.IndexFieldStorageValueFormatter = context.Index.Configuration.IndexFieldStorageValueFormatter;
            Operations.Add(sitecoreIndexableItem, context, index.Configuration);
          }
        }
      }
    }

    Index.Locator.GetInstance<IEvent>().RaiseEvent("indexing:added", context.Index.Name, indexable.UniqueId, indexable.AbsolutePath);
  }
}


DoUpdate

For the DoUpdate method I did something similar although I had to change a bit more here.
protected override void DoUpdate(IProviderUpdateContext context, SitecoreIndexableItem indexable, IndexEntryOperationContext operationContext)
{
  Assert.ArgumentNotNull(context, "context");
  Assert.ArgumentNotNull(indexable, "indexable");
  using (new LanguageFallbackItemSwitcher(Index.EnableItemLanguageFallback))
  {
    if (IndexUpdateNeedDelete(indexable))
    {
      Index.Locator.GetInstance<IEvent>().RaiseEvent("indexing:deleteitem", index.Name, indexable.UniqueId, indexable.AbsolutePath);
      Operations.Delete(indexable, context);
    }
    else
    {
      Index.Locator.GetInstance<IEvent>().RaiseEvent("indexing:updatingitem", index.Name, indexable.UniqueId, indexable.AbsolutePath);
      if (!IsExcludedFromIndex(indexable, true))
      {
        if (operationContext != null && !operationContext.NeedUpdateAllLanguages)
 {
   if (!indexable.Item.Language.Name.Equals(indexLanguage, StringComparison.OrdinalIgnoreCase))
   {
     CrawlingLog.Log.Debug(string.Format(CultureInfo.InvariantCulture, "SitecoreItemCrawler : Update : English not requested {0}. Skipping.", indexable.Item.Uri));
            return;
   }
        }
     
 Item item;
 var languageItem = LanguageManager.GetLanguage(indexLanguage);
 using (new WriteCachesDisabler())
 {
   item = indexable.Item.Database.GetItem(indexable.Item.ID, languageItem, Version.Latest);
 }

 if (item == null)
 {
    CrawlingLog.Log.Warn(string.Format(CultureInfo.InvariantCulture, "SitecoreItemCrawler : Update : Latest version not found for item {0}. Skipping.", indexable.Item.Uri));
 }
 else
 {
   Item[] versions;
   using (new SitecoreCachesDisabler())
   {
     versions = item.Versions.GetVersions(false);
   }

   foreach (var version in versions)
   {
     if (version.Version.Equals(item.Version))
     {
       UpdateItemVersion(context, version, operationContext);
     }
     else  
     {
       Index.Locator.GetInstance<IEvent>().RaiseEvent("indexing:deleteitem", index.Name, indexable.UniqueId, indexable.AbsolutePath);
       Delete(context, ((SitecoreIndexableItem)version).UniqueId);
     }
   }
 }
    
 Index.Locator.GetInstance<IEvent>().RaiseEvent("indexing:updateditem", index.Name, indexable.UniqueId, indexable.AbsolutePath);
      }


      if (!DocumentOptions.ProcessDependencies)
      {
        return;
      }

      if (indexable.Item.Language.Name.Equals(indexLanguage, StringComparison.OrdinalIgnoreCase))
      {
        Index.Locator.GetInstance<IEvent>().RaiseEvent("indexing:updatedependents", index.Name, indexable.UniqueId, indexable.AbsolutePath);
 UpdateDependents(context, indexable);
      }
    }
  }
}

I did a few things here:
  • if the operationContext is not asking to update all languages, I check the language and get it out if it is not the index language
  • I get all versions, loop trough them and update the latest - other versions get a delete instruction
    • not sure if this is really needed as it might be sufficient to delete only the previous one
  • the call to update the dependent items was put in a language condition so that it was only executed when the requested language is the index language

Testing

And I started testing. Rebuild. Add versions. Update items. Constantly using Luke to investigate the index. It all seemed to work. 
Until I tried to add a new version in a language that was not supposed to be in the index. The new version was not send to the index, but it's previous version was. I tried to figure out what was happening and by following the flow through the existing SitecoreItemCrawler I found some options in the "IndexEntryOperationContext" that were used in the base Update function.

Update

So we also override the Update method:
public override void Update(IProviderUpdateContext context, IIndexableUniqueId indexableUniqueId, IndexEntryOperationContext operationContext, IndexingOptions indexingOptions = IndexingOptions.Default)
{
  operationContext.NeedUpdatePreviousVersion = false;
  base.Update(context, indexableUniqueId, operationContext, indexingOptions);
}

What I'm doing here is actually quite simple: I tell the crawler that he does not need to update previous versions, no matter what. As I am already updating all versions in the DoUpdate this seemed ok to do. By doing this, the problem was fixed and I did not had to copy too much code anymore.

Conclusion

The custom crawler works and does what it is supposed to do. It would have been nice though if the functions in the crawler provided by Sitecore were cut into smaller pieces to make it easier to override the pieces we want to change. I remember reading somewhere that Pavel Veller already managed to get this on a roadmap, so I hope that is true...

But for now, this worked for me. Glad to hear any remarks, suggestions, ...

Wednesday, September 21, 2016

Sitecore Symposium 2016 (New Orleans)

Sitecore Symposium 2016 : a developer view

New Orleans: city of lively music, amusing drinks, po-boy beignets and the 2016 Sitecore Symposium. 

In this post I will share some of my thoughts on attended sessions from a developers point of view. A bit more in-depth information on some topics will follow: blogged and presented on SUG Belux.

Starting the event with a brass band immediately set the tone: this was going to be an experience! Where did we here that word before... and again. In the keynote, between the announcements of the Sitecore Experience Accelerator (SXA), serious updates to Path Analyzer and EXM, or the new Commerce vNext. Not to forget Sitecore on Azure.

Day 1

The developer keynote was a good news show for developers with the "best practices" called Helix (Habitat is the example), a view on the open standards being used, .net core being embraced, a Sitecore nuget, and a move to more open source projects (Rocks, PathFinder, SIM, ...). But the main focus was community. Cool!
The community website should be known to all. The Slack channels get more and more users and usually someone is always there to answer your Sitecore question (in between the small talk). We should not forget Twitter, the many blogs out there and the user groups all over the world - including the amazing SugCon in Copenhagen this year. And recently a dedicated StackExchange site went in to beta. Proud to be part of all this!


xConnect

My first session was about xConnect. A promising new framework that should give us an (easy) API to work with analytics data. Sitecore will be using the framework itself in several modules. We will be able to use it to integrate all kinds of external data into xDB (write) or get all sorts of combined data out of xDB (read) to be used in code or external tools (e.g. Power BI). xConnext is not yet available, but will be shortly.


Commerce vNext

"Sitecore Commerce vNext is a brand new, state of the art commerce engine, designed from the ground up as an integral part of the Sitecore Experience Platform, built on ASP.NET Core." That's what they say. Sounds good though, and in just a few more months  we should be able to test if it. The demo showed a nicely integrated platform with lots of options in the box, but also an architecture that should provide lots of integration points where custom development - 'Plugins" -  can be hooked into the processes.


Sitecore Experience Accelerator (SXA)

Mentioned in two keynotes, so this SXA must be the new hype in Sitecore land. As it all looks nice with lots of "buts", I can't make up my mind on this one. It's something to look at and investigate further, that's for sure. It has some great features to rapidly create new sites and/or pages without the need for a developer. Front-end developers will be pleased to hear that in a future version we should be able to choose the grid system. It's a module with great opportunities but also with some challenges for implementation partners. Update-1 should be available in the very near future...


We finished our day with a warm-up in the partner pavillion, getting ready for the party in the House of Blues. This turned out to be quite an experience (didn't use that word enough so far). But this is a developers view so nor drinks nor a stage filled with Sitecore-women sounds interesting, right?


Day 2

The keynote of day 2 can be captured in: "Play hard. Work hard.". Sounds like a plan! 

Multi-lingual

I started the sessions with a view on how to conquer languages in Sitecore. We got an interesting round-up of what the current language fallback can do and how to use it. Unfortunately I got the feeling that the audience (including myself) hoped for some more real-life solutions to multi-lingual (sometimes combined with multi-site) issues. I hope I could help some people by pointing them to our EasyLingo module on the marketplace, and would be pleased to get feedback.

Security

After missing Bas Lijten's session at SugCon Copenhagen this year, I had to attend this time. Although his demo got pwned the session still provided some good information on presumably basic security settings that are unfortunately still not always tackled. I would like to point to Bas' project on GitHub on security in Sitecore projects. I must admit I didn't find the time to really check it out but it is definitely on my radar and should be on yours too.

Testing

Next in line was Dan Solovay - a fully seated session on unit testing in a Sitecore project.  Based on Sitecore 8.2, which made the session very interesting. The majority of the audience was already aware of FakeDB and unit testing principles, but Dan managed to point out some tips and tricks not everyone knew. And the new capabilities in Sitecore caused by the move towards interfaces and virtual functions are very promising for test-driven developers. If you are interested in unit-testing, make sure to check the information on Dan's blog.


Publishing

They saved the best for last... the new publishing service presented by Stephen Pope looks very good. It's a complete new way of handling the publishing, making it a separate service that handles it's stuff in bulk operations making it very fast and robust.

It's a very lightweight process on .net core. An interface was created in the Sitecore admin to see what is going on in the publish service, and developers will be pleased to know that there is also a debug mode allowing you to follow all the steps in a console window. The service is a first version now in Sitecore 8.2 and will evolve as some topics are still in the backlog, but it's already a huge change in a part of the framework that hadn't truly changed since..  well, a long time. Sites that need to handle large publishes will surely benefit and it will become easier for content editors as they don't need to know about different publishes nor need to wait for a counter that goes up to..  And as icing on the cake: "publish site" is gone! (except for admins who know where they have hidden the button).


Final

The final keynote gave us a sneak of the future, but if you want to know about that: start saving for Las Vegas 2017!


Conclusion

It was a great event. An experience (did I use it enough now?). It truly was. A symposium is a place to meet people. Which I did. A chance to say hi to guys you only see online the rest of the year because they reside in Sri Lanka (Chaturanga) or in the far away Netherlands (Bas, Robbert, ...) and to meet new people - and I surely still missed some guys.

A symposium is also a place to catch up on new stuff, get some insights, tips and tricks to create even better Sitecore solutions. And I did.

Although it might look quite impossible to make the next symposium even better, I would like to give one remark for the organizing team. Based upon feedback that I heard from several people after different sessions I would suggest to give session some sort of "level" indication. Now the sessions are divided between developers, marketers and business people which is good but in quite a few cases attendants came out of a session disappointed because they learned (almost) nothing. Sessions at a lower level are very useful and needed for a part of the audience, but there are quite a few experts as well - so it would be nice to know upfront what the target of the session is. It's probably more difficult then it sounds but I'm quite sure it would make the experience even better.

Experience!

Monday, August 15, 2016

EasyLingo 2.1: multi-site, multi-lingual and now with XP editor support

EasyLingo 2.1


EasyLingo 2.1 was just released to the marketplace. After version 1 we promised to include support for the experience editor and so we did. Kris wrote a nice post about the how-to.

Once in the experience editor, in the view tab amongst the other "bars" you can select the "Language bar" and you will get the same EasyLingo experience as in the content editor.


We also added one more (optional) version section: in Sitecore you can create versions of an item in languages that are not registered in the systems settings. These versions are now listed as well -separately- by the module. Note that these versions will always use a general flag as we cannot detect it from the system items.

More information on this great module in my previous post. You can find the code and all documentation files on GitHub.  The module itself is available on the Sitecore marketplace.


Monday, August 1, 2016

EasyLingo

EasyLingo, our first module on the Sitecore marketplace


Why

This language expansion module was designed to simplify content editing when using a large amount of languages in your Sitecore environments. When you have multiple sites with different language sets (e.g. a Belgian site in Dutch/French, a Swiss site in fr/de/it and a Danish site in dk/en) or simply a large volume of available languages, managing these languages in Sitecore can become cumbersome.

Sitecore has no out of the box functionality that restricts or manages the languages used per node/site and only offers the languages list to navigate through the available languages. The language list presented by Sitecore comprises of both those with one or more versions as well as those that have no version available or are irrelevant for that context/site.

This module was created on a Sitecore 8.1 platform together with my colleague and Sitecore MVP Kris Verheire and is now available on the Sitecore marketplace.

What

This module consists of 2 parts, which can be activated separately.

Extra languages section in the content editor


The bar consists of 3 language lists:

  • On the first line, two of the lists are displayed. On the left hand side, the first list shows all the languages that have an actual version available. 
  • The right side shows the second list with all the languages for which a fallback version exists (working through Sitecore’s item fallback available as of version 8.1). 
  • The second line hold the third list that shows languages which are available on this node/site, but for which no version exists. This line will disappear if there are no such languages.
The versions with fallback on the right are rendered in italic. The current language on the Sitecore context is visualized in bold.


Languages in all the lists are clickable so the editor can easily switch languages without having to go through the whole list.

In order to get a nice view like in the screenshots it is necessary to manually set the icons of the languages in the system section of Sitecore (as Sitecore does not use these icons anymore in the list, they are not set by default. Flag-icons are still available though).


How are “available” languages detected?

We loop through the configured sites and check whether the current item is part of it (based on the
path in the content tree and the “rootPath” of the site). For each site we check if a custom property “allowedLanguages” is available in the SiteSettings specific site node. The distinct union of all these languages will be the list of allowed languages for the item. If the list is empty, all available languages in the Sitecore instance are allowed.

How to use the “allowedLanguages” setting?

The parameter will be part of a <site /> definition (just like hostname, database, rootPath and so on). It is not obligatory – the module works perfectly without it. It can be used for multi-site solution with different languages. For our example mentioned above we could have something like:
<site name=”Belgian” allowedLanguages="nl,fr-BE" … />
<site name=”Swiss” allowedLanguages="fr,de,it" … />
<site name=”Danish” allowedLanguages="dk,en" … />
The language should match the used language exactly (so “fr-BE” ≠ “fr”) and can be completely different or overlap. For the second part of the module it is important though to put the “default” language first.

Second part: request resolver

The second part of the module consists of a request resolver that is put in the httpRequestBegin pipeline after the LanguageResolver.
The current requested URL is checked to disable the functionality for Sitecore URL’s or when not in normal page mode. The current context site is checked for the ‘allowedLanguages’ parameter. If found, and the current language is not part of the ‘allowedLanguages’ set we will redirect the user to homepage in the default language (default is the first language in the set).

Future features

The EasyLingo bar is now only available in the Content Editor. The next step would be to introduce a language bar in Sitecore’s Experience Editor that allows users to quickly switch between the available and allowed languages for the content they are editing. (is already in progress)
We are also working on adding versions of items in languages that are not listed in the system languages.

More information


Friday, July 15, 2016

Sitecore WFFM: act on success

The question I had to tackle was to change the redirect after a successful form submit based on a form value. By doing so I learned we can do a lot on success (or on error). Using Sitecore 8.1...

Success (and error) WFFM pipelines

All comes down to finding the correct pipelines - as usual in Sitecore. In our case we found a pipeline in case of success and one in case of error. But be aware: there is a big difference between the webforms and mvc solution.

Webforms

The pipelines in case of webforms are:
  • <successAction>
  • <errorSubmit>
These can be found in Sitecore.Forms.config.

Mvc

The pipelines in case of mvc are:
  • <wffm.success>
  • <wffm.error>
These can be found in Sitecore.MvcForms.config.


Custom redirect after success submit

In case of webforms, we could write a processor that redirects to the location we want and place it in the successAction pipeline as first processor (just before the original 'SuccessRedirect').

In case of MVC, it's a different story.

MVC solution 

The wffm.success is by default empty. The actual redirect happens in another pipeline later on. So redirecting here is not the right thing to do. I started writing the processor and noticed that I had a lot of information in a Sitecore.Forms.Mvc.Models.FormModel.

You have access to all the fields, and to the SuccessRedirectUrl property. At this point this is filled with the url as set in Sitecore (which is very useful as a base) and you can alter it as you please. The actual redirect will happen later but it will use the value you have set here.

Code example

public class SuccessRedirect : FormProcessorBase<IFormModel>
{
    public override void Process(FormProcessorArgs<IFormModel> args)
    {
        Assert.ArgumentNotNull((object)args, "args");
        var model = args.Model as FormModel;
        if (model == null)
            return;
         model.SuccessRedirectUrl = model.SuccessRedirectUrl + "?val=" + model.Results[0].Value;
    }
 }

This example shows you to inherit from Sitecore.Forms.Mvc.Pipelines.FormProcessorBase and implement the Process method. Cast the arguments Model property to a FormModel and start using it. I add a querystring to the redirect url with the value of the first field - sounds useless but it's just an example.

Conclusion

As often in WFFM there is a big difference between Webforms and Mvc. I tried the mvc way, and found that you can actually do a lot before Sitecore handles the model. You can change the redirect url, but there are probably also other useful possibilities here for scenarios I can't think of now...

Thursday, June 16, 2016

Sitecore Index dependencies

I recently stumbled upon a question on how to trigger re-indexing of related content in a Sitecore (Lucene) index. Different answers were given and I got the feeling that not everyone already knows about the getDependencies pipeline. So we write a blog post...

Re-index related content

As I mentioned, there are other solutions that could do the trick. 
  • Custom update strategy

    You could write your own update strategy and include your dependency logic in there. This approach has the benefit that you can use it in one index only without affecting others.
  • Custom save handler

    With a custom save handler you could detect save actions, get the dependent items and register them as well for index updating. I'm not convinced that this will work in all update strategy scenario's but if you have working code, feel free to share ;)
These are probably also valid solutions, but I'll leave those to others as I want to show the Sitecore pipeline that looks like the ideal candidate for the job.

getDependencies pipeline

There is a pipeline.. there always is. One drawback I'll mention already is that the pipeline is for all indexes and so far I have not found a way to trigger it for one index only (see update below on disabling). I also tried to get the index (name or anything) in the code but that didn't work out either. We could get the name of the job, but that was only relevant for the first batch of items - after that, multiple jobs were started and the name became meaningless. 

Anyway, the pipeline. In the Sitecore.ContentSearch.config you'll find this:
<!-- INDEXING GET DEPENDENCIES
  This pipeline fetches dependant items when one item is being index. Useful for fetching related or connected items that also
  need to be updated in the indexes.
  Arguments: (IQueryable) Open session to the search index, (Item) The item being indexed.
  Examples: Update clone references.
  Update the data sources that are used in the presentation components for the item being indexed.
-->

<indexing.getDependencies help="Processors should derive from Sitecore.ContentSearch.Pipelines.GetDependencies.BaseProcessor">
  <!-- When indexing an item, make sure its clones get re-indexed as well -->
  <!--<processor type="Sitecore.ContentSearch.Pipelines.GetDependencies.GetCloningDependencies, Sitecore.ContentSearch"/>-->
  <!-- When indexing an item, make sure its datasources that are used in the presentation details gets re-indexed as well -->
  <!--<processor type="Sitecore.ContentSearch.Pipelines.GetDependencies.GetDatasourceDependencies, Sitecore.ContentSearch"/>-->
</indexing.getDependencies>

As you can see, some processors are in the box, but in comments. You can simply enable them if you want your clones and/or datasources to be indexed with the main items.

And you can write your own processor of course. An example:
public class GetPageDependencies : Sitecore.ContentSearch.Pipelines.GetDependencies.BaseProcessor
{
    public override void Process(GetDependenciesArgs context)
    {
        Assert.IsNotNull(context.IndexedItem, "indexed item");
        Assert.IsNotNull(context.Dependencies, "dependencies");
            
        var scIndexable = context.IndexedItem as SitecoreIndexableItem;
        if (scIndexable == null) return;
            
        var item = scIndexable.Item;
        if (item == null) return;
            
        // optimization to reduce indexing time by skipping this logic for items not in the Web database
        if (!string.Equals(item.Database.Name, "web", StringComparison.OrdinalIgnoreCase)) return;
            
        if (!item.Paths.IsContentItem) return;
            
        if (item.Name.Equals("__Standard Values", StringComparison.OrdinalIgnoreCase)) return;
            
        if (Sitecore.Context.Job == null) return;
            
        // logic here - example = get first child
        if (!item.HasChildren) return;
            
        var dependency = item.Children[0];
        var id = (SitecoreItemUniqueId)dependency.Uri;
        if (!context.Dependencies.Contains(id))
        {
            context.Dependencies.Add(id);
        }
    }
}

In the example here we keep it simple and just add the first child (if any). That logic can contain anything though.

As you can see we try to get out of the processor as fast as possible. You can add even more checks based on template and so on. Getting out fast if you don't want the dependencies is important!

The benefit of the solution is that the pipeline is executed when the indexing starts but before the list of items to index is finalized - which is the best moment for this task. All "extra" items are added to the original list so they are executed (indexed) by the same job and we let the Sitecore handle them they way it was meant.

Performance might not seem an issue, but when having quite some items and dependencies, and these get updated frequently it will be. You might be triggering way too much items towards the index, so be careful (no matter what solution you go for). The indexing is be a background job but if it goes berserk you will notice.
Note that it is a good thing that your dependencies don't have to go through all kind of processes before being added, they are just "added to the list".

I found this pipeline solution very useful in scenario's where the amount of dependent items that actually got added was not too big. Don't forget you can also disable the pipeline processor temporarily (and perform a rebuild) if needed.

How to Enable/Disable 

(from the Sitecore Search and Indexing on SDN) - thx jammykam for the info

The pipeline is executed from within each crawler if the crawler’s ProcessDependencies property is set to true, which is the default. To disable this feature, add the following parameter to the appropriate index under the <Configuration /> section.
<index id="content" ...>
 ...
 <Configuration type="...">
...
 <ProcessDependencies>false</ProcessDependencies>
Alternatively, if the indexes don’t override default configuration with a local one, you can also globally change this setting in the DefaultIndexConfiguration.

Known issues with the indexing.getDependencies pipeline

https://kb.sitecore.net/articles/116076

Thursday, June 2, 2016

Sitecore WebApi missing context

Sitecore & WebApi


A lot has already been written about Sitecore and WebApi the last years since your custom WebApi calls didn't work anymore without a little tweaking. We have used the solution by Patrick Delancy a few times now and it worked fine. Until today..
Well, the issue seemed to be in the WebApi but it turned out to be something else. My journey of the day:

WebApi call is missing all Sitecore context

Our starting point was indeed a web api request that had no Sitecore context. The request looked like this: 
"http://website/api/stores/nearby/50.860421/4.422365"

First thing to do was compare configs and code with other projects where it was working, but that didn't help. All was fine there.. 
When I tried to place a language in between the domain and the path (../en/api/...) I got a 404 error from IIS. Weird. Nothing from Sitecore, although this should work. So I had my first conclusion: Sitecore is rejecting the request. 

Inspect the httpRequestBegin pipeline

I started inspecting the httpRequestBegin pipeline and noticed that it was skipped in the first step, the CheckIgnoreFlag. A custom processor placed before this step got hit, the one right behind it didn't. So I had to continue my search in.. 

The preprocessRequest pipeline

The preprocessRequest performs several checks in order to determine whether the request is valid for Sitecore. After staring at it for a while my eye fell on the dot. A simple stupid ".". The web api action was expecting 2 doubles as parameters and as this all should work find, there is a filter in this Sitecore pipeline on extensions: the FilterUrlExtensions. And of course, Sitecore is thinking that our extension is 422365 :)

The fix

Fixing this seemed very simple: just a a trailing slash to the request. And there we had our context again!

So remember when using doubles in web api request: use a trailing slash if it is your last parameter...

Sunday, May 29, 2016

Sitecore WFFM MVC FileUploadField restrictions

Sitecore WFFM FileUploadField

There are already some blogpost around about custom FileUploadFields, but as things have changed a bit in the latest Web Forms for Marketers releases and certainly with the introduction of MVC in WFFM I thought it could be useful to share the custom field we created on a Sitecore 8.1 update-1 environment with MVC forms.

Let's start by creating some validation attributes...

Validation attributes


Validation for file size


We inherit from DynamicValidationBase and override ValidateFieldValue.
[AttributeUsage(AttributeTargets.Property | AttributeTargets.Field)]
public sealed class LimitFileSizeAttribute : DynamicValidationBase
{
    private const string FileSizeLimitKey = "filesizelimit";
    private const string ErrorMessageKey = "filesizelimiterror";

    protected override ValidationResult ValidateFieldValue(IViewModel model, object value, ValidationContext validationContext)
    {
        // Required attribute should handle null value
        if (value == null)
        {
            return ValidationResult.Success;
        }

        var fileBase = value as HttpPostedFileBase;
        if (fileBase == null)
        {
            return new ValidationResult(ErrorMessage);
        }

        var fileUploadField = validationContext.ObjectInstance as FileUploadField;
        var limit = GetLimit(fileUploadField);

        if (limit == -1) // Limit not set
        {
            return ValidationResult.Success;
        }

        if (fileBase.ContentLength > limit)
        {
             return new ValidationResult(GetErrorMessage(fileUploadField));
        }

        return ValidationResult.Success;
    }
 
    private static int GetLimit(IViewModel field)
    {
        if (field == null || !field.Parameters.ContainsKey(FileSizeLimitKey))
        {
            return -1;
        }

        var parameter = field.Parameters[FileSizeLimitKey];
        int intValue;
        if (int.TryParse(parameter, out intValue))
        {
            return intValue;
        }

        return -1;
    }

    private string GetErrorMessage(IViewModel field)
    {
        if (field != null && field.Parameters.ContainsKey(ErrorMessageKey))
        {
            return field.Parameters[ErrorMessageKey];
        }

        return ErrorMessage;
    }
}

The size limit and the error message are retrieved from the parameters on the field.

Validation for allowed extensions

We can create a similar class to validate the extension by using the Path.GetExtension(fileBase.FileName). Of course, other validations are also possible.


MVC Restricted FileUploadField

We inherit from the base FileUploadField in Sitecore.Forms.Mvc.ViewModels.Fields and override the "Value" property, just to add the custom created attributes.

public class RestrictedUploadField : Sitecore.Forms.Mvc.ViewModels.Fields.FileUploadField
{
    [LimitAllowedExtensions]
    [LimitFileSize]
    public override HttpPostedFileBase Value { get; set; }
}


Register in Sitecore

The new custom field needs to be registered in Sitecore:


Usage
Now we can start using our field in a mvc form. Do not forget to fill in the necessary parameters and/or Localized parameters - in case of our example code with the file size limit these are:
  • Parameters : <FileSizeLimit>10485760</FileSizeLimit>
  • Localized parameters : <FileSizeLimitError>File size must be under 10 mb</FileSizeLimitError>

I did not present you a complete FileUpload module here, but the given examples should provide enough information to get you started in your quest to create a customized file upload field in Sitecore WFFM with MVC.

Thursday, May 26, 2016

Sitecore item buckets view settings

Item buckets and the content editor

You have probably heard and seen item buckets already. The basic information can be found on Sitecore's documentation site. In the content editor, the items in a bucket are hidden by default (the documentation shows you how to view them anyway if you want) and the editor is encouraged to use the search. After searching, the results are displayed and the editor can pick an item to edit. By default, this item opens in a tab:

The tab... nested

Once your editor has selected an item, he will get a tab with a nested view. Inside the tab is the ribbon for the current item. Although this all works, we had some editors that got confused. They used the top ribbon to start a publish, hereby publishing the whole bucket. 
So we went looking for options to tweak this, and we found them. In the box.  

Item bucket settings

At "/sitecore/system/Settings/Buckets/Item Buckets Settings" you will find a field called "Show Search Results In". The default value is "New Tab".
The options are:
  • New Tab : [default value] a selected items opens in a tab
  • New Tab Not Selected: as new tab without selection
  • New Content Editor: this might be the one you want.. it will open the selected item not in a new tab, but in a new editor window. If you are in the desktop mode, you will get this window full size and can switch between the windows through the bottom bar. In the content editor mode the new window will not be full sized when created, and will look more like an overlay.
Note that these settings are for all buckets in the system and for all users, so you might need to talk to multiple editors to ask there preference.

Enjoy, you just might have made your editors happy!

Friday, May 20, 2016

WFFM SendMail message routing

Sitecore WFFM SendMail SaveAction

People who have been working with Sitecore WebForms for Marketers probably all know the SendMail save action to send an email after submitting the form. The mail can contain data entered in the mail and can be send to a fixed address or an address provided in the form. But.. sometimes you do want/need your form to send this email to a different email address based on the value chosen in a dropdown list (e.g. the department the visitor wants to contact).

Custom routing

The code I will share here will demonstrate this routing scenario, where the administrators could define in the list of departments the corresponding email address(es). It can be used as a base for similar situations as well. [We are using Sitecore 8.1 update 1]

The implementation

Our implementation works on a value entered in the "To" field of the mail template. If that value contains a fixed string and a guid pointing towards the dropdown field to identify the recipient we check if we can find the value of that field in a defined folder. The found item will give us the recipients' email-address(es) in one of the fields.

The code

Lets have a look at the code (stripped a bit, I removed the logging to just keep the main points here):

public void Process(ProcessMessageArgs args)
{
 if (args == null || args.To == null) { return; }

 var toEmail = args.To.ToString();
 if (!toEmail.Contains(EmailKey)) { return; }

 var fieldIdValue = toEmail.Replace(EmailKey, string.Empty);
 Guid fieldId;
 if (!Guid.TryParse(fieldIdValue, out fieldId)) { return; }

 var field = args.Fields.GetEntryByID(new ID(fieldId));
 if (field == null) { return; }

 var formDataItem = settingsRepository.GetSettingItem("Forms.FormDataRoot");
 if (formDataItem == null) { return; }

 var result = Sitecore.Context.Database.SelectSingleItem(string.Format(CultureInfo.InvariantCulture, "fast:{0}//*[@@name='{1}']", formDataItem.Paths.FullPath, field.Value));
 if (result == null) { return; }

 var toAddress = result["To"];
 if (string.IsNullOrEmpty(toAddress)) { return; }

 args.To.Clear();
 args.To.Append(toAddress);
}

The steps we perform in this function are:

  1. Check the arguments, especially the "To" value as that is our target
  2. We check if the "To" value contains a constant value EmailKey (if not, we skip)
  3. We check if the remainder of the "To" field is a Guid (if not, we skip)
  4. We try to find a field in the form with this Guid as ID
  5. We (try to) get the root of the values (using our SettingsRepository which is a custom piece of code - it just comes down to fetching an item from Sitecore)
  6. We do a fast query in that root to get the item that corresponds with the selected item (value) in the defined field (if not found, we skip)
  7. We get the value of the "To" field in the found item and use this as the new recipient for the mail by clearing and assigning the "To" field of the arguments. 

The config


<pipelines>
  <processMessage>
    <processor patch:before="processor[@method='SendEmail']" type="xx.Wffm.Pipelines.RouteMessage, xx.Wffm" />
  </processMessage>
</pipelines>

We add our class to the processMessage pipeline just before the mail is send.
And that's it. Nothing more to it.

Tuesday, April 5, 2016

Multiple static Sitecore MVC forms

Multiple Sitecore MVC forms

Reinoud Van Dalen wrote a famous blog post over a year ago about multiple Sitecore MVC forms on a single page. His fix was based on some good work from Kevin Brechbühl and it helped us a lot. But recently we bumped into an issue on a Sitecore 8.1 project with mvc forms that were added on a more static way with @Html.Sitecore.Rendering().

Html.Sitecore.Rendering()

We created controller renderings for our forms in Sitecore and used their id's to display the statically bound rendering using @Html.Sitecore.Rendering(). We noticed that when we add such a rendering with Sitecore in a placeholder the code worked fine and the RenderingToken was set. But once the same rendering was placed statically, the CurrentRendering.UniqueId was an empty guid.

One could wonder why we place our forms statically in a View but we have our reasons. The views containing the static bound form-renderings can be placed in placeholders or also statically, that does not make a difference - the UniqueId stays empty.

A fix

We fixed this by making a small change to the original code:

RenderingToken


public static class SitecoreHelperExtensions
{
    public static MvcHtmlString RenderingToken(this SitecoreHelper helper)
    {
        if (helper?.CurrentRendering == null)
        {
            return null;
        }

        var tagBuilder = new TagBuilder("input");
        tagBuilder.Attributes["type"] = "hidden";
        tagBuilder.Attributes["name"] = "uid";
        tagBuilder.Attributes["value"] = helper.CurrentRendering.UniqueId +
                                            helper.CurrentRendering.RenderingItemPath;

        return new MvcHtmlString(tagBuilder.ToString(TagRenderMode.SelfClosing));
    }
}

ValidRenderingTokenAttribute


[AttributeUsage(AttributeTargets.Method)]
public sealed class ValidRenderingTokenAttribute : ActionMethodSelectorAttribute
{
    public override bool IsValidForRequest(ControllerContext controllerContext, System.Reflection.MethodInfo methodInfo)
    {
        var rendering = RenderingContext.CurrentOrNull;
        if (rendering == null || controllerContext == null)
        {
            return false;
        }

        var id = controllerContext.HttpContext.Request.Form["uid"];
        return id.Equals(rendering.Rendering.UniqueId + rendering.Rendering.RenderingItemPath, StringComparison.OrdinalIgnoreCase);
    }
}

The only thing we did was adding the RenderingItemPath to the hidden token.
The "bonus" from Reinouds code to be able to include the same form multiple times on a page still exists as long as the form is added with Sitecore on a placeholder for at least all but one occasions. It is not possible to add the same form twice statically though.


Thanks again to Reinoud for sharing his code on multiple mvc forms - hopefully this little addition can help people who need to add forms statically.

Tuesday, March 22, 2016

Custom index update strategy

ComputedIndexField with dependencies to other items

Ever had a ComputedIndexField that gathered data from other items than the item currently being indexed? For example, from its children. Or from items referred to..  I just had a situation where we needed (a property of) the children to be included in our ComputedIndexField.
But what happens if you update a child item? The child is re-indexed but the parent is not as this was not changed, not published, ...  We were using the onPublishEndAsync update strategy and didn't want to have a solution that needed a rebuild periodically just to keep the index up to date.

There is a GetDependencies pipeline that can be used to add extra items to the indexable list, but that was no option as this pipeline is for all indexes and we wanted it just for our custom index and preferably configurable per index (thinking about performance as well..)

Extend the onPublishEnd update strategy

So, we started thinking of extending the update strategy. We found some examples on the internet but not in our Sitecore version (we are using Sitecore 8.1) and the examples didn't go far enough.

What we wanted was:
  • the base onPublishEnd strategy (that would still check for rebuilds and so on)
  • an extension that would add the first ascendant of the item of a defined template to the list of indexable items

I had a look at the code of the OnPublishEndAsynchronousStrategy with DotPeek and noticed that this was extendable indeed. 

Let's start by creating our class by doing what a developer is good at: copy/paste :)

[DataContract]
public class OnPublishEndWithAncestorAsynchronousStrategy : OnPublishEndAsynchronousStrategy
{
    public string ParentTemplateId { get; set; }
    public string ChildTemplateId { get; set; }

    public OnPublishEndWithAncestorAsynchronousStrategy(string database) : base(database)
    {
    }
}

We created a class that extends OnPublishEndAsynchronousStrategy and gave it a constructor that needs the database name (which will be passed in the config). We also defined two variables to identify the templates that are affected - both parent (ancestor item to look for) as child (item to start from).

Performance

The child item template(s) are requested because our strategy code is executed before the crawler's root path is checked and before the 'DocumentOptions' are checked (like 'IncludeTemplates'). As this extended strategy is already heavier than the original one we wanted to prevent getting even more performance hits for items we don't need to check. This will become clear later on...

Configuration


<strategies hint="list:AddStrategy">
  <onPublishEndWithAncestorAsync type="Xx.OnPublishEndWithAncestorAsynchronousStrategy, Xx">
    <param desc="database">web</param>
    <ParentTemplateId>{0F5141D6-F264-4D03-B5D2-3505E6F308E7}</ParentTemplateId>
    <ChildTemplateId>{2A993FF2-5F17-4EEA-AD53-5343794F86BB}{066DEA00-31D7-4838-94A6-8D05A7FC690E}</ChildTemplateId>
  </onPublishEndWithAncestorAsync>
</strategies>

In the strategies section where you normally add your strategies by pointing towards the one(s) defined in the default Sitecore index configurations we define our custom strategy by providing the type. We send the database (web) as parameter and define the guids for the templates. In this example code we can send multiple child templates.

The index run

After some investigation, it turned out we only had to override one method: "Run". 
We started by copy/pasting the original code and checked the extension points:
  • if the item queue is empty: we leave the original code 
  • if the item queue is so big a rebuild is suggested: we keep the original code as a rebuild will also update the ancestor we might add
  • else..
We kept the original code to fetch the list of items to refresh. We don't actually get the items as "Item" but as "IndexableInfo" objects. For each entry in this list we call our GetAncestor function. The result is checked for null and added to the original list only if is wasn't already in there.


protected override void Run(List<QueuedEvent> queue, ISearchIndex index)
{
    CrawlingLog.Log.Debug($"[Index={index.Name}] {GetType().Name} executing.");
    if (Database == null)
    {
        CrawlingLog.Log.Fatal($"[Index={index.Name}] OperationMonitor has invalid parameters. Index Update cancelled.");
    }
    else
    {
        queue = queue.Where(q => q.Timestamp > (index.Summary.LastUpdatedTimestamp ?? 0L)).ToList();
        if (queue.Count <= 0)
        {
            CrawlingLog.Log.Debug($"[Index={index.Name}] Event Queue is empty. Incremental update returns");
        }
        else if (CheckForThreshold && queue.Count > ContentSearchSettings.FullRebuildItemCountThreshold())
        {
            CrawlingLog.Log.Warn($"[Index={index.Name}] The number of changes exceeded maximum threshold of '{ContentSearchSettings.FullRebuildItemCountThreshold()}'.");
            if (RaiseRemoteEvents)
            {
                IndexCustodian.FullRebuild(index).Wait();
            }
            else
            {
                IndexCustodian.FullRebuildRemote(index).Wait();
            }
        }
        else
        {
            var list = ExtractIndexableInfoFromQueue(queue).ToList();
            // custom code start here...
            CrawlingLog.Log.Info($"[Index={index.Name}] Found '{list.Count}' items from Event Queue.");
            var result = new List<IndexableInfo>();
            CrawlingLog.Log.Info($"[Index={index.Name}] OnPublishEndWithAncestorAsynchronousStrategy executing.");
            foreach (var itemInfo in list)
            {
                var ancestor = GetAncestor(itemInfo);
                if (ancestor != null)
                {
                    if (list.Any(i => i.IndexableId.Equals(ancestor.IndexableId, StringComparison.OrdinalIgnoreCase)))
                    {
                        CrawlingLog.Log.Info($"[Index={index.Name}] Ancestor already in list '{ancestor.IndexableId}'.");
                    }
                    else
                    {
                        CrawlingLog.Log.Info($"[Index={index.Name}] Adding ancestor '{ancestor.IndexableId}'.");
                        result.Add(ancestor);
                    }
                }
            }

            list.AddRange(result);
            CrawlingLog.Log.Info($"[Index={index.Name}] Updating '{list.Count}' items.");
            IndexCustodian.IncrementalUpdate(index, list).Wait();
        }
    }
}

Job(s)

One of the noticeable things here is that we add the extra indexable items to the existing list called with the incremental update. We could also call the Refresh method on the IndexCustodian but that would create extra (background) jobs so this way seems more efficient.

The ancestor check

Last thing to do is the ancestor check itself. For our requirements we needed to find an ancestor of a defined template but this functions could actually do anything. Just keep in mind the performance as this function will be called a lot.. (any ideas how to further improve this are welcome)

private IndexableInfo GetAncestor(IndexableInfo info)
{
    try
    {
 var childTemplateId = ChildTemplateId.ToLowerInvariant();
 var item = Database.GetItem(((ItemUri)info.IndexableUniqueId.Value).ItemID);
 if (item != null && childTemplateId.Contains(item.TemplateID.Guid.ToString("B")))
 {
     var ancestor = item.Axes.GetAncestors().ToList().FindLast(i => i.TemplateID.Guid.ToString("B").Equals(ParentTemplateId, StringComparison.OrdinalIgnoreCase));
     if (ancestor != null)
     {
  return new IndexableInfo(
                        new SitecoreItemUniqueId(
                            new ItemUri(ancestor.ID, ancestor.Language, ancestor.Version, Database)), 
                            info.Timestamp)
    {
        IsSharedFieldChanged = info.IsSharedFieldChanged
    };
     }
 }
    }
    catch (Exception e)
    {
 CrawlingLog.Log.Error($"[Index] Error getting ancestor for '{info.IndexableId}'.", e);
    }

    return null;
}


Using the child template in the config as well, might seems like a limitation but here it gives us a good performance gain because we limit the number of (slow) ancestor look-ups a lot. We still need to do that first lookup of the actual item to detect the template though.
We catch all exceptions - ok, might be bad practice - just to make sure in our test that one failure doesn't break it all.

Conclusion

As usual, we managed to tweak Sitecore in a fairly easy manor. This example can hopefully lead you towards more optimizations and other implementations of custom index features. Suggestions and/or improvements are welcome...


Tuesday, March 1, 2016

Query.MaxItems in Sitecore 8.1

Small tip for people using Query.MaxItems and upgrading to 8.1


Setting the maximum number of results from a Query

As you might know Sitecore has a setting called "Query.MaxItems". The default value of this setting is 100 (well, in the base config file). Setting this value to 0 will make queries return all results without limit - which might (will) have a negative impact on performance in case of a large result set.

We aware that this setting not only influences your own queries, but also some api calls (Axes, SelectItems, ...) and Sitecore fields that use queries underneath. It does not affect fast queries.


The Query.MaxItems value in Sitecore 8.1 : 260

Using queries is in lots of cases not a good idea and as a fan of indexes I (almost) never use them myself but some questions came up when people were upgrading so I decided to blog this little tip: 
in Sitecore 8.1 the Query.MaxItems value is patched in Sitecore.ExperienceExplorer.config and set to 260
If you patched the value yourself and did not use a separate include file (as you should!) and did not take care that your include file comes at the end (prefix with z is a common trick - using a subfolder starting with z- is a better one) this new value of 260 will overwrite yours.

Friday, February 26, 2016

Custom indexes in a Sitecore Helix architecture

Sitecore Helix/Habitat

Most Sitecore developers probably know what Sitecore Habitat and Sitecore Helix is about right now, especially since the 2016 Hackathon. Several interesting blog posts have already been written about the architecture (e.g. this one by Anders Laub) and video's have been posted on Youtube by Thomas Eldblom.

Custom indexes

I use custom indexes very frequently. So I started thinking about how I could use custom indexes in a "Helix" architecture. When creating a feature that uses such a custom index, the configuration for that index has to be in the feature. That is perfectly possible as we can create a separate index config file. But what are the things we define in that config file?

  • index
    • a name
    • the strategy
    • crawler(s)
    • ...
  • index configuration
    • field map
    • document options
      • computed index fields
      • include templates
      • ...
    • ...

Some of these settings can be defined in our feature without issue: the name -obviously- and the stategy (e.g. onPublishEndAsync) can be defined. A crawler might be the first difficulty but this can be set to a very high level (e.g. <Root>/sitecore/content</Root>)

In the index configuration we can also define the fieldMap and such. In the documentOptions section we can (must) define our computed index fields. But then we should define our included templates. And that was were I got stuck..  in a feature I don't know my template, just base templates..

Patching

A first thought was to use the patching mechanism from Sitecore. We could define our index and it's configuration in the feature and patch the included templates and/or crawlers in the project.
Sounds like a plan, but especially for the included templates it didn't feel quite right.

For the index itself patching will be necessary in some cases.. e.g. to enable or disable Item/Field language fallback. If needed it is also possible to patch the content root in the project level.

Included templates? Included base templates!

For the included templates in the document options I was searching for another solution so I decided to throw my question on the Sitecore Slack Helix/Habitat channel and ended up in a discussion with Thomas Eldblom and Sitecore junkie Mike Reynolds. Thomas came up with the idea to hook into the index process to enable it to include base templates and Mike kept pushing me to do it and so.. I wrote an extension to configure your index based on base templates.

The code is a proof of concept.. it can -probably- be made better still but let this be a start.


Custom document options

I started by taking a look at one of my custom indexes to see what Sitecore was doing with the documentOptions sections and took a look at their code in Sitecore.ContentSearch.LuceneProvider.LuceneDocumentBuilderOptions. As you can guess, the poc is done with Lucene..

Configuration

The idea was to create a custom document options class by inheriting from the LuceneDocumentBuilderOptions. I could add a new method to allow adding templates in a new section with included base templates. This will not break any other configuration sections.

An example config looks like:
<documentOptions type="YourNamespace.TestOptions, YourAssembly">
    <indexAllFields>true</indexAllFields>
    <include hint="list:AddIncludedBaseTemplate">
        <BaseTemplate1>{B6FADEA4-61EE-435F-A9EF-B6C9C3B9CB2E}</BaseTemplate1>
    </include>
</documentOptions>
This looks very familiar - as intended. We create a new include section with the hint "list:AddIncludedBaseTemplate". The name 'AddIncludedBaseTemplate' will come back later in our code.

Code

Related templates

The first function we created was to get all templates that relate to our base template:

private IEnumerable<Item> GetLinkedTemplates(Item item)
{
  var links = Globals.LinkDatabase.GetReferrers(item, new ID("{12C33F3F-86C5-43A5-AEB4-5598CEC45116}"));
  if (links == null)
  {
    return new List<Item>();
  }

  var items = links.Select(i => i.GetSourceItem()).Where(i => i != null).ToList();
  var result = new List<Item>();
  foreach (var linkItem in items)
  {
    result.AddRange(GetLinkedTemplates(linkItem));
  }

  items.AddRange(result);
  return items;
}

We use the link database to get the referrers and use the Guid of the "Base template" field of a template to make sure that we get references in that field only - which also makes sure that all results are actual Template items.
The function is recursive because a template using your base template can again be a base template for another template (which will by design also include your original base template). The result is a list of items.

A second function will use our first one to generate a list of Guids from the ID of the original base template:
public IEnumerable<string> GetLinkedTemplates(ID id)
{
  var item = Factory.GetDatabase("web").GetItem(id);
  Assert.IsNotNull(item, "Configuration : templateId cannot be found");

  var linkedItems = GetLinkedTemplates(item);
  return linkedItems.Select(l => l.ID.Guid.ToString("B").ToUpperInvariant()).Distinct();
}

As you can see what we do here is try to fetch the item from the id and call our GetLinkedTemplates function. From the results we take the distinct list of guid-strings - in uppercase.

Context database

One big remark here is the fact that I don't know what the database is - if somebody knows how to do that, please let me (and everybody) know. The context database in my tests was 'core' - I tried to find the database defined in the crawler because that is the one you would need but no luck so far.

And finally...

AddIncludedBaseTemplate

public virtual void AddIncludedBaseTemplate(string templateId)
{
  Assert.ArgumentNotNull(templateId, "templateId");
  ID id;
  Assert.IsTrue(ID.TryParse(templateId, out id), "Configuration: AddIncludedBaseTemplate entry is not a valid GUID. Template ID Value: " + templateId);
  foreach (var linkedId in GetLinkedTemplates(id))
  {
    AddTemplateFilter(linkedId, true);
  }
}

Our main function is called "AddIncludedBaseTemplate" - this is consistent with the name used in the configuration. In the end we want to use the "AddTemplateFilter" function from the base DocumentBuilderOptions - the 'true' parameter is telling the function that the templates are included (false is excluded). So we convert the template guid coming in to an ID to validate it and use it in the functions we created to get all related templates.

Performance

Determining your included templates is apparently only done once at startup. So if you have a lot of base templates to include which have lots of templates using them, don't worry about this code being called on every index update. Which of course doesn't mean we shouldn't think about performance here ;)

Conclusion

So we are now able to configure our index to only use templates that inherit from our base templates. Cool. Does it end here? No.. you can re-use this logic to create other document options as well to tweak your index behavior. 

And once more: thanks to Thomas & Mike for the good chat that lead to this.. The community works :)

Wednesday, February 24, 2016

Translating WFFM 8.1 MVC forms error messages part II

Multilingual WFFM

The first post in this duo-series of posts handled the client-side validation of Sitecore's WebForms for Marketers. In this post I want to focus on the server-side error messages: changing them, translating them and the pitfalls you might encounter doing so.

Server-side validation and error messages

Server side validation is a must in forms - no need to tell you that. When using MVC forms you can alter the default messages here:
/sitecore/system/Modules/Web Forms for Marketers/Settings/Meta data/Mvc Validation Error Messages


Translating

As the "value" field of these items is not shared, one would assume that translating the error messages is nothing more than creating versions in other languages and filling in your translated message.
And yes, at first sight you might think that works as you will get to see error messages in a language that could be something else then English and could be even the current language. But it all depends on.. whether you were the first one to request the error messages. As far as we could detect, WFFM caches the error messages but forgot to take the language into account when caching...

So, how do we fix this? Luckily there is a way out. In the documentation of wffm 2.x the "Custom Errors" are mentioned and they are still present in 8.1...

Custom errors

Custom errors are items that can be used as error messages. A few ones exist and you can create more if needed. We used the available custom required and created a new custom email to test.
The items have a key: just look at the regular error message that you would like to use and copy the key (e.g. DynamicRequiredAttribute or DynamicEmailAttribute). In the "value" field you enter your custom message. 
Now create versions for all languages and translate the message as needed.

Using the custom errors

After creating custom error messages, we need to tell our forms to use them. Unfortunately this needs to be done for every field...


In the content editor go to your (required) field. Find the "Dictionary" section and select the desired entries from the list of all custom errors. In many cases that will just be the Custom required, but on an email field you can select for example Custom required and Custom email. Once you've done this for all your fields you're good to go.

Just don't forget to publish all your changes... 

Translating WFFM 8.1 MVC forms error messages part I

Multilingual WFFM

WebForms for Marketers has quite some issues challenges with multilingualism in version 8.1 but in this post I want to focus on the error messages. Error messages come in 2 flavors: client-side and server-side. This first post will handle the client-side validation - server side is for part II.

Client-side validation and error messages

For client-side validation we encountered several issues. First of all, we could not get the messages multi-lingual. Secondly, they didn't work for some fields (e.g. the checkbox list). So the idea we came up with is simple: we remove the client-side validation. 

Removing the client-side validation

First thing to do is disable "Is Ajax MVC Form". Normally this should be sufficient. And it will.. on the first request. But once your visitor gets a validation error (from the server-side validation) the form is reloaded and the client-side validation is back. 

So, let's go for some more serious enhancements then. We'll get rid of the javascript performing the validation!

In "sitecore modules\Web\Web Forms for Marketers\mvc" you will find (amongst others) 2 javascript files: main.js and wffm.js. 

Main.js

  • Remove "jquery_validate: "sitecore%20modules/Web/Web%20Forms%20for%20Marketers/mvc/libs/jquery/jquery.validate.min",
  • Remove "jquery_validate_unobtrusive: "sitecore%20modules/Web/Web%20Forms%20for%20Marketers/mvc/libs/jquery/jquery.validate.unobtrusive.min",
  • Edit the "shim" part by removing all references to jquery_validate and jquery_validate_unobtrusive
This should result in:

...
require.config(
{
  baseUrl: generateBaseUrl(),
  paths: {
   jquery: "sitecore%20modules/Web/Web%20Forms%20for%20Marketers/mvc/libs/jquery/jquery-2.1.3.min",
   jquery_ui: "sitecore%20modules/Web/Web%20Forms%20for%20Marketers/mvc/libs/jquery/jquery-ui-1.11.3.min",
   bootstrap: "sitecore%20modules/Web/Web%20Forms%20for%20Marketers/mvc/libs/bootstrap/bootstrap.min",
   wffm: "sitecore%20modules/Web/Web%20Forms%20for%20Marketers/mvc/wffm.min"
  },
  waitSeconds: 200,
  shim: {
    "bootstrap": {
      deps: ["jquery"]
    },
    "jquery_ui": {
      deps: ["jquery"]
    },
    "wffm": {
      deps: ["jquery", "jquery_ui", "bootstrap"]
    }
  }
});
...

Wffm.js

In wffm.js there are several lines referring to the validation which will show errors in your browsers console when you do not remove them. So we started cleaning up.. posting the whole resulting javascript file would be a bit too long but if you take these steps you will get there:

  • remove the "if (ajaxForm)" part
  • remove the $scw.validator.setDefaults part
  • search for validator and remove the references
  • remove any now unused functions 

And last but not least: as you could see in main.js, the minified version of wff.js is used so you will need to minify your changed version and overwrite wffm.min.js.